SpringCloud Config客户端配置
1. 创建客户端配置文件
在microservice-config工程中创建 microservicecloud-config-client.yml 文件,并推送到Github私有仓库中
1
2
3
4
5
6
7
8
9
10
11
12
13
14
15
16
17
18
19
20
21
22
23
24
25
26
| spring:
profiles:
active:
- dev
---
server:
port: 8201
spring:
profiles: dev
application:
name: microservicecloud-config-client
eureka:
client:
service-url:
defaultZone: http://eureka-dev.com:7001/eureka/
---
server:
port: 8202
spring:
profiles: test
application:
name: microservicecloud-config-client
eureka:
client:
service-url:
defaultZone: http://eureka-test.com:7001/eureka/
|
2. 创建客户端工程
2.1 新建microservicecloud-config-client-3355
略
2.2 pom.xml文件
1
2
3
4
5
6
7
8
9
10
11
12
13
14
15
16
17
18
19
20
21
22
23
24
25
26
27
28
29
30
31
32
33
34
35
36
37
38
39
40
41
42
43
44
45
46
47
48
49
50
51
52
53
54
55
56
57
58
59
60
61
62
63
64
65
66
67
68
69
70
71
72
| <?xml version="1.0" encoding="UTF-8"?>
<project xmlns="http://maven.apache.org/POM/4.0.0" xmlns:xsi="http://www.w3.org/2001/XMLSchema-instance"
xsi:schemaLocation="http://maven.apache.org/POM/4.0.0 https://maven.apache.org/xsd/maven-4.0.0.xsd">
<modelVersion>4.0.0</modelVersion>
<parent>
<groupId>com.hellodev</groupId>
<artifactId>atguigu-microservicecloud</artifactId>
<version>0.0.1</version>
</parent>
<artifactId>microservicecloud-config-client-3355</artifactId>
<version>0.0.1</version>
<dependencies>
<dependency>
<groupId>com.hellodev</groupId>
<artifactId>microservicecloud-api</artifactId>
<version>${project.version}</version>
</dependency>
<dependency>
<groupId>org.springframework.cloud</groupId>
<artifactId>spring-cloud-starter- config</artifactId>
</dependency>
<dependency>
<groupId>org.springframework.cloud</groupId>
<artifactId>spring-cloud-starter-hystrix</artifactId>
</dependency>
<dependency>
<groupId>org.springframework.cloud</groupId>
<artifactId>spring-cloud-starter-eureka</artifactId>
</dependency>
<dependency>
<groupId>org.springframework.cloud</groupId>
<artifactId>spring-cloud-starter-config</artifactId>
</dependency>
<dependency>
<groupId>org.springframework.boot</groupId>
<artifactId>spring-boot-starter-actuator</artifactId>
</dependency>
<dependency>
<groupId>junit</groupId>
<artifactId>junit</artifactId>
</dependency>
<dependency>
<groupId>ch.qos.logback</groupId>
<artifactId>logback-core</artifactId>
</dependency>
<dependency>
<groupId>org.springframework.boot</groupId>
<artifactId>spring-boot-starter-jetty</artifactId>
</dependency>
<dependency>
<groupId>org.springframework.boot</groupId>
<artifactId>spring-boot-starter-web</artifactId>
</dependency>
<dependency>
<groupId>org.springframework.boot</groupId>
<artifactId>spring-boot-starter-test</artifactId>
</dependency>
<dependency>
<groupId>org.springframework</groupId>
<artifactId>springloaded</artifactId>
</dependency>
<dependency>
<groupId>org.springframework.boot</groupId>
<artifactId>spring-boot-devtools</artifactId>
</dependency>
</dependencies>
</project>
|
2.3 创建bootstrap.yml
applicaiton.yml是用户级的资源配置项
bootstrap.yml是系统级的, 优先级更加高
Spring Cloud会创建一个Bootstrap Context,作为Spring应用的Application Context的 父上下文 。初始化的时候,Bootstrap Context负责从外部源加载配置属性并解析配置。这两个上下文共享一个从外部获取的Environment。Bootstrap属性有高优先级,默认情况下,它们不会被本地配置覆盖。Bootstrap context和Application Context有着不同的约定,
所以新增了一个bootstrap.yml文件,保证Bootstrap Context和Application Context配置的分离。
1
2
3
4
5
6
7
8
9
10
| spring:
cloud:
config:
name: microservicecloud-config-client
profile: dev
label: master
uri: http://config-3344.com:3344
|
2.4 创建application.yml文件
1
2
3
| spring:
application:
name: microservicecloud-config-client
|
2.5 hosts文件增加
1
| 127.0.0.1 client-config.com
|
2.6 新建 ConfigClientRest
1
2
3
4
5
6
7
8
9
10
11
12
13
14
15
| @RestController
public class ConfigClientRest {
@Value("${spring.application.name}")
private String applicationName;
@Value("${eureka.client.service-url.defaultZone}")
private String eurekaServers;
@Value("${server.port}")
private String port;
@RequestMapping("/config")
public String getConfig() {
String str = "applicationName: " + applicationName + "\t eurekaServers:" + eurekaServers + "\t port: " + port;
System.out.println("******str: " + str);
return "applicationName: " + applicationName + "\t eurekaServers:" + eurekaServers + "\t port: " + port;
}
}
|
2.7 主启动类
1
2
3
4
5
6
| @SpringBootApplication
public class ConfigClient3355Application {
public static void main(String[] args) {
SpringApplication.run(ConfigClient3355Application.class, args);
}
}
|
2.8 验证
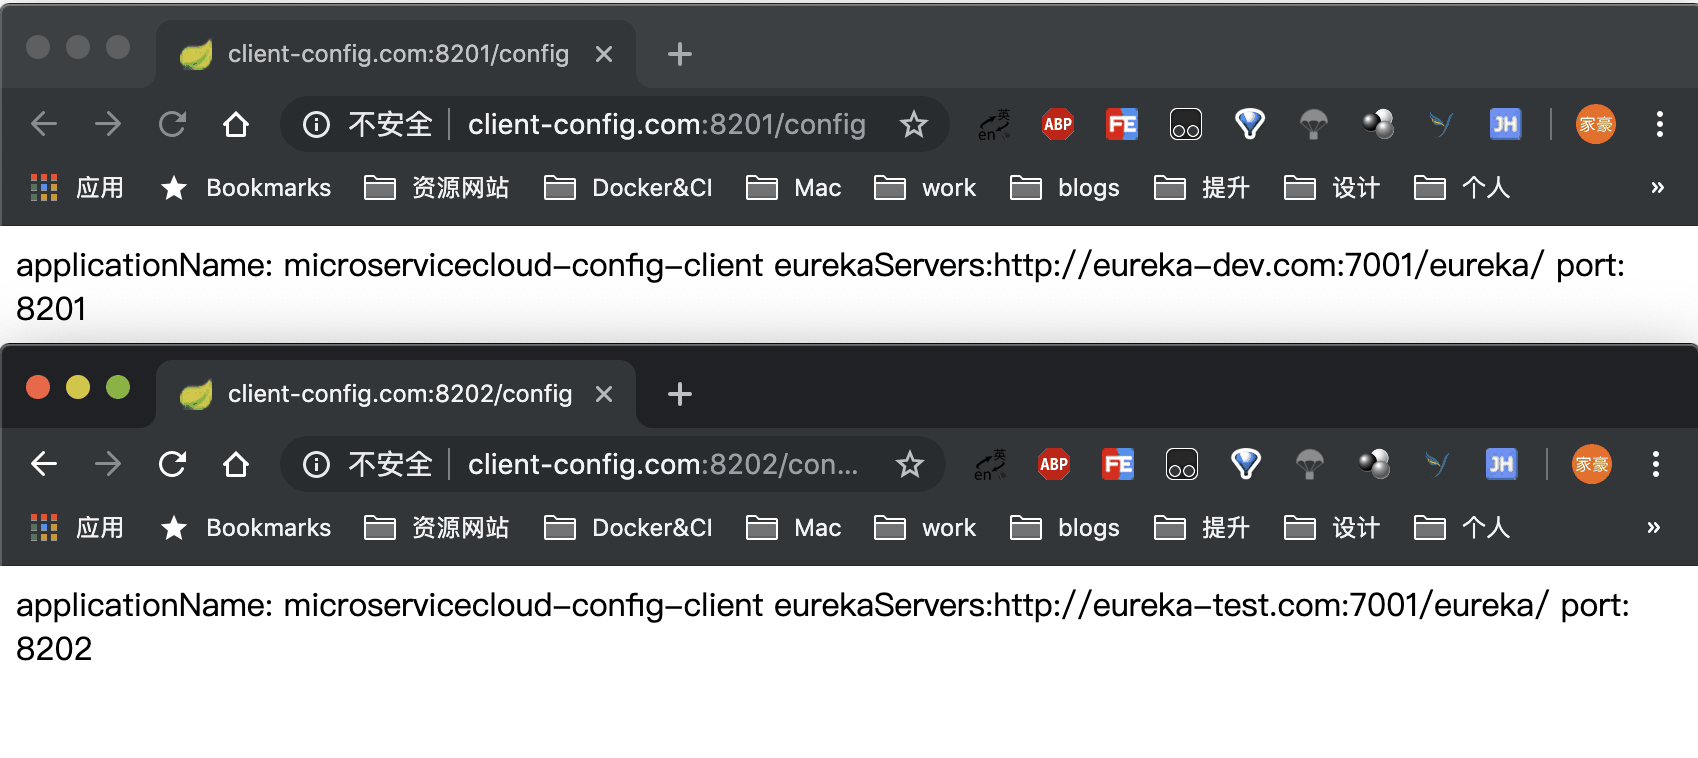
成功实现了客户端3355访问SpringCloud Config3344通过GitHub获取配置信息
资源获取
公众号回复 : SpringCloud Config客户端配置 获取本节代码
公众号回复 : SpringCloud思维导图
Tips
欢迎收藏和转发,感谢你的支持!(๑•̀ㅂ•́)و✧
欢迎关注我:后端小哥,专注后端开发,希望和你一起进步!